


This is a guide on how to improve Core Web Vitals (8 Ways) and make your web pages fast on all devices thereby increasing your search appearance online.
Google uses certain factors to evaluate and rank websites. One of the important factors is called Core Web Vitals (CWV), which assesses the user experience on a website. Wrong implementation of CWV is among the reasons Why Blog Posts are Not Ranking on Google Search Engine or Removed. But when you correctly optimize several aspects of your website, you can provide a better user experience and increase the likelihood of ranking higher in search results.
The bitter truth is that, if you don’t optimize your site for these metrics, it can negatively affect your search engine rankings and how users perceive your site. However, the good news is that once you learn about Core Web Vitals and how to measure them, you can make improvements to enhance the user experience.
But if you follow these guidelines well, you’ll provide a better website experience for your users and meet Google’s criteria for better visibility in search results.
Join me in the journey of this post, so that we can talk about Google’s Core Web Vitals, why they matter, and how they function. After that, we will share eight methods you can use to enhance these vitals. So let’s get started!
What is Core Web Vitals
Google Core Web Vitals are a group of important metrics that Google uses to assess the performance and overall user experience of websites. These metrics help determine how fast a website loads, how quickly it becomes interactive, and how stable it remains during use.
For an accurate evaluation of these indicators, Google aims to provide users with a better browsing experience by prioritizing websites that offer fast, responsive, and stable performance.
These Core Web Vitals are like signals that tell Google how good or bad your website’s user experience is. They help measure things like how fast your website loads and how easy it is for people to use it.
For instance, if your website takes too long to load, people might get frustrated and leave. This can hurt your website’s ranking on Google and affect your business’s success. The same goes for websites that are hard to navigate – if people can’t find what they’re looking for easily, they might give up and go somewhere else.
Why is Core Web Vitals Important to Website?
Core Web Vitals are significant because they play a role in enhancing your search results. They assist Google in evaluating the performance of your website and pinpointing areas that need improvement. These metrics specifically focus on the following aspects:
- Loading Speed: How quickly your web page loads and becomes visible to users.
- Interactivity: How responsive your website is to user interactions, such as clicking buttons or filling out forms.
- Visual Stability: How stable the elements on your webpage are, ensuring they don’t unexpectedly shift or move around, causing a frustrating experience for users.
In addition to Core Web Vitals, Google takes into account other factors when evaluating the quality of a website. One important factor is mobile-friendliness because many people now use their mobile devices to browse the internet. If your website isn’t optimized for mobile devices, you might miss out on a significant amount of traffic and potential customers.
Website security is another crucial aspect as it protects your site and users’ information from online threats like hacking and malware. If you organize your website security, it helps to ensure the safety of your content and the data of your visitors.
When you meet these standards and optimizing Core Web Vitals, you can improve your website’s performance and achieve higher rankings in search results. In simpler terms, focusing on these factors benefits both your users’ experience and your website’s visibility in search engines. It’s a win-win situation!
How does Core Web Vitals Work for Websites?
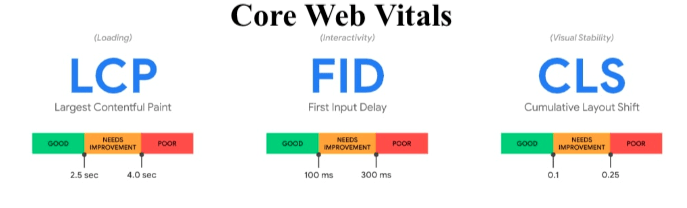
Core Web Vitals are specific measurements that form part of Google’s Page Experience score, which is a ranking signal introduced in 2021. Let’s dig deeper into these three key measurements:
- Largest Contentful Paint (LCP): This measures how long it takes for the main content of your website to appear to visitors. It focuses on the loading time of the largest elements like images and videos.
- First Input Delay (FID): FID analyzes how responsive your web pages are when users interact with them for the first time. It measures the time it takes for the browser to start processing user actions like clicks or taps.
- Cumulative Layout Shift (CLS): CLS assesses the visual stability of your web page. It checks if there are any elements on the screen that shift or move during the loading process, potentially causing disruptions to users’ reading or browsing experience.
Additionally, there is a fourth measurement called First Contentful Paint (FCP), which calculates the time it takes for the browser to render the first piece of content, such as an image, on a web page.
How to Measure Core Web Vitals of a Website
Before diving into improving your Core Web Vitals scores, it’s important to understand your website’s current performance levels. This will help you track your progress and evaluate the impact of any optimizations you make. Regularly assessing your scores is a valuable part of maintaining your website.
- Use Google’s tools: Google offers various tools to assess your website’s performance, including PageSpeed Insights, Lighthouse, and the Core Web Vitals report in Google Search Console. These tools provide detailed insights and recommendations for improving your scores.
- Web performance testing tools: There are several third-party tools available, such as GTmetrix, Pingdom, or WebPageTest, that can measure your website’s performance. They provide information on loading times, page size, and other performance metrics.
- Real user monitoring (RUM): RUM tools track the actual experiences of your website visitors by collecting data on their interactions. This data helps you understand how your site performs for real users and identify areas for improvement.
- Web analytics: Your existing web analytics platform, such as Google Analytics, may provide some performance-related data. Look for metrics like page load times, bounce rates, or average session duration, which can give you an indication of your site’s performance.
You can use these measurement methods, so that you can gain valuable insights into your website’s performance. From there, you can easily identify areas where you can focus your optimization efforts.
Now, let me give a better explanation of a few methods you can use to measure your website’s performance:
1. PageSpeed Insights
There are several online tools available to measure Core Web Vitals, such as Pingdom and GTmetrix. However, our recommendation is to use Google PageSpeed Insights for this purpose.
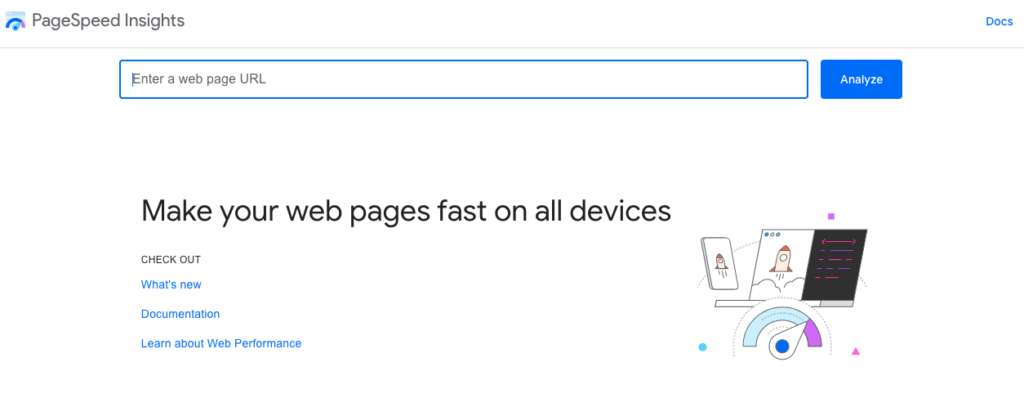
To begin the process, you can simply enter your website’s URL into Google PageSpeed Insights and click on the Analyze button. Once the analysis is complete, the tool will assign a grade to your site based on its overall performance. Additionally, it will provide a summary of important data and Core Web Vitals metrics, giving you an overview of how your website is performing.
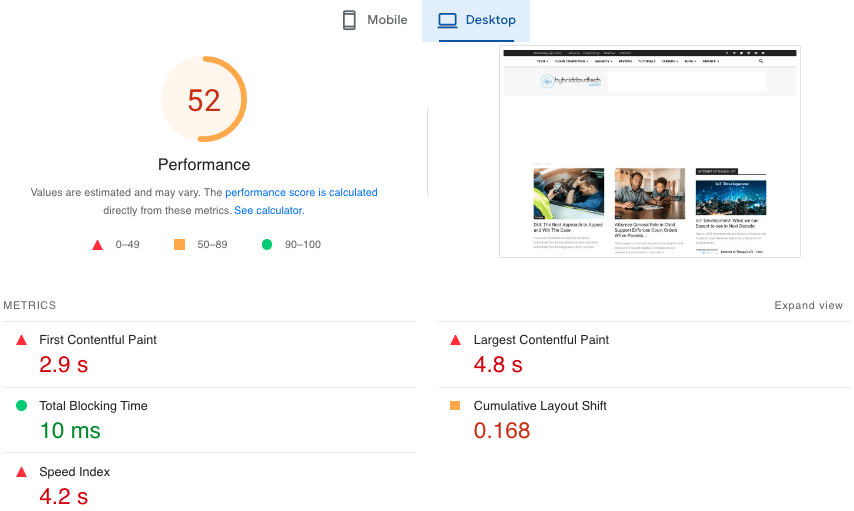
Under the Metrics section of Google PageSpeed Insights, you can find the results of your website’s performance.
- FCP: 2.9 seconds
- LCP: 4.8 seconds
- FID: Less than 100 milliseconds
- CLS: Less than 0.168 second
- SI: 4.2 seconds
As a general guideline, it is recommended to aim for the following scores:
- Largest Contentful Paint (LCP): Ideally, your LCP score should be less than 2.5 seconds.
- First Input Delay (FID): Aim for an FID score of less than 100 milliseconds.
- Cumulative Layout Shift (CLS): Your CLS score should be kept below 0.1.
Just so you know, when you use Google PageSpeed Insights, you can test both the mobile and desktop versions of your website. It’s pretty cool because you can also analyze specific pages on your site by selecting the Origin tab.
Once the analysis is done, the results page will show you some diagnostics and suggestions to make your site better. Depending on your site’s score, PageSpeed Insights will give you recommendations to increase your score and improve how your site performs. It’s really helpful in figuring out what changes you can make to make your website faster and more efficient.
2. Chrome User Experience Report
If you’re a developer or webmaster, you can also access your Core Web Vitals data through the Chrome User Experience Report. This report, available in Google Search Console, provides valuable information and real data about how your website is experienced by your visitors.
To view this report, you’ll need to go to your Google Search Console dashboard. From there, you can navigate to the Core Web Vitals section, which can be found under the Page Experience category.
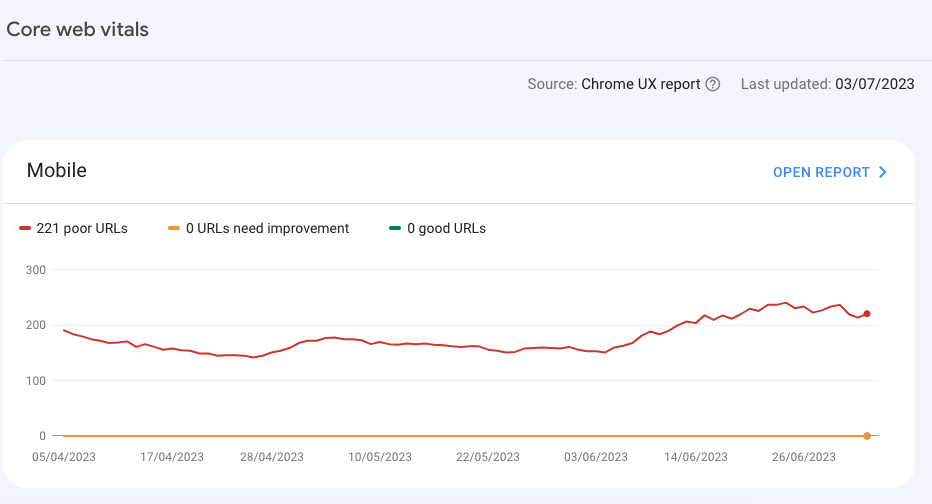
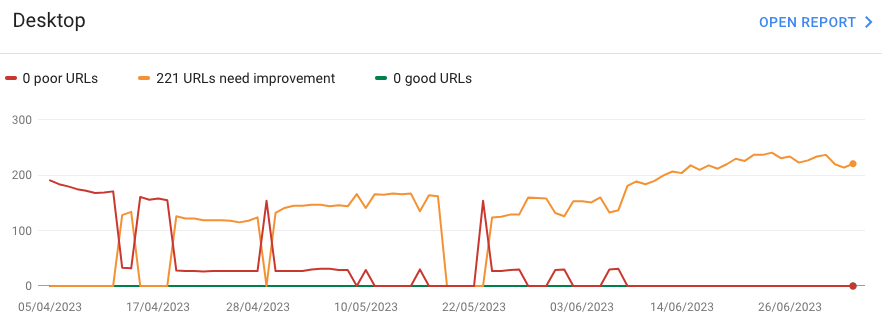
It’s a great way to gain insights into how users interact with your site and make informed improvements based on real user data.
3. Core Web Vitals Chrome Extension
If you use Google Chrome as your web browser, there’s another useful tool you can use to evaluate your Core Web Vitals. It’s called the Web Vitals Chrome extension.
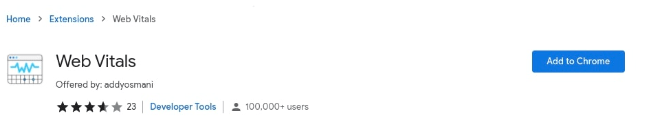
The Web Vitals Chrome extension is a tool that helps you check how fast and well your website is working. It gives you info on important things like how long it takes for your pages to load, how big they are, and how many requests they make. Plus, it gives you tips on how to make your website perform better.
The cool part is that you can use this extension to test any website, not just yours. To get started, just install the extension and open the website you want to check. The extension will start keeping track of how the website performs and give you an easy-to-understand report with the results. It’s a handy tool to evaluate and improve your website’s performance.
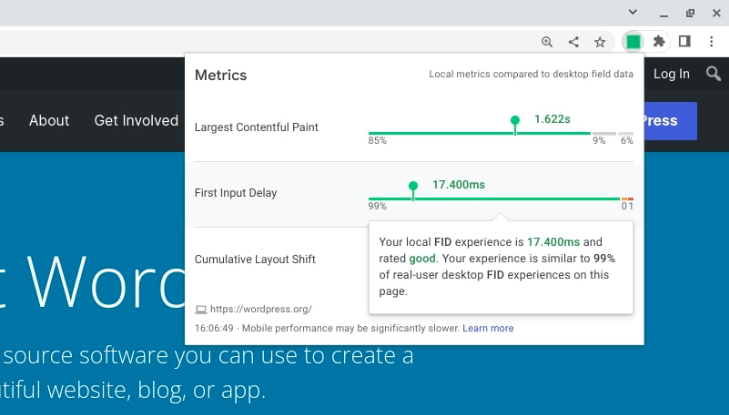
During the audit using the Web Vitals Chrome extension, you’ll be able to see the scores for LCP, CLS, and FID automatically. This feature is quite handy if you frequently want to check these scores, as you can view them without the need to open another tab or perform additional steps. It saves you time and makes it easier to keep track of the performance of your website.
How to Improve Core Web Vitals (8 Best Methods)
Now that we have a good understanding of Core Web Vitals and how they function, let’s explore some best practices to improve your scores. It’s important to note that the actions you need to take will vary based on your test results. So, make sure to consider the suggestions and recommendations provided by PageSpeed Insights or other testing tools you use.
Here are a few effective ways you can enhance your Core Web Vitals scores:
1. Install and Implement a Caching Plugin Solution
One effective way to improve your Core Web Vitals scores is by implementing caching for your website. Caching helps reduce the workload on your server by storing static versions of your web pages. This means that when visitors access your site, they can load these cached versions instead of generating the pages from scratch each time.
Depending on your web host, you may have server-level caching options available. For example, at DreamHost, certain WordPress plans include server-side caching.
If you’re using WordPress, you can also utilize caching plugins to improve your website’s performance. One popular choice is the W3 Total Cache plugin. It helps optimize your site’s caching settings and enhance the loading speed of your pages.
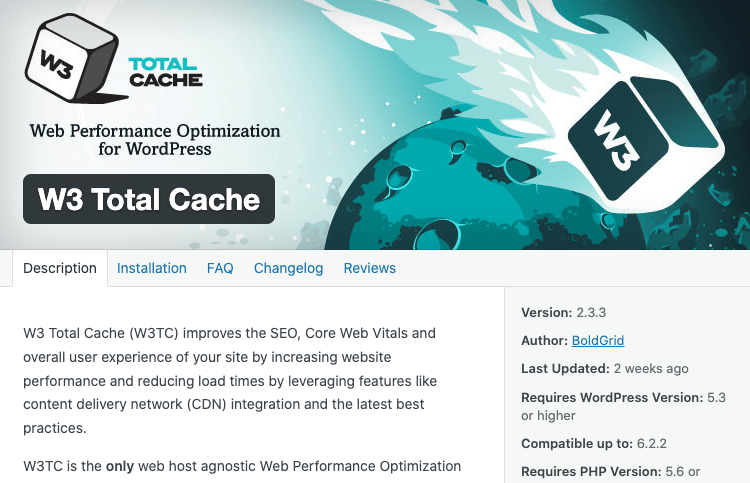
W3 Total Cache is a free WordPress plugin that can significantly reduce the loading times of your website, thereby enhancing its overall performance. This plugin provides various caching features, including caching of pages, posts, CSS, JavaScript, and database objects. If you install plugin that has these caching techniques, your website can deliver content faster to visitors, resulting in improved user experience and better Core Web Vitals scores.
Some additional free plugin options include:
If you’re looking for an all-in-one, powerful caching tool, you might consider WP Rocket:
I recommend that you make use of a premium caching solution can be especially beneficial for improving your First Input Delay (FID) score. One such solution is WP Rocket, which offers a feature that simplifies the optimization of file delivery.
Additionally, WP Rocket provides several other features that can help enhance your Core Web Vitals scores, which we’ll talk about in the upcoming sections. By leveraging these features, you can optimize your website’s performance and create a better user experience.
2. Eliminate Render-Blocking Resources with CSS Minifier
Render-blocking elements are the static HTML, CSS, and JavaScript files that are necessary to display a page on your website. These files often contain scripts that can delay the loading of content, impacting the user experience. Usually, these files come from third-party plugins or tools like Google Analytics.
To improve your user experience and Core Web Vitals, you can address render-blocking resources by minimizing them and removing any unused CSS or scripts. There are various techniques you can employ for this. One approach is to minify your JavaScript and CSS files, which involves removing unnecessary spaces or comments.
To simplify this process, you can use tools like CSS Minifier, which help you easily optimize your CSS code and make it more efficient. This way, you can reduce the render-blocking elements and enhance the performance of your website. There’s a guide to Minify CSS output with Sass too.
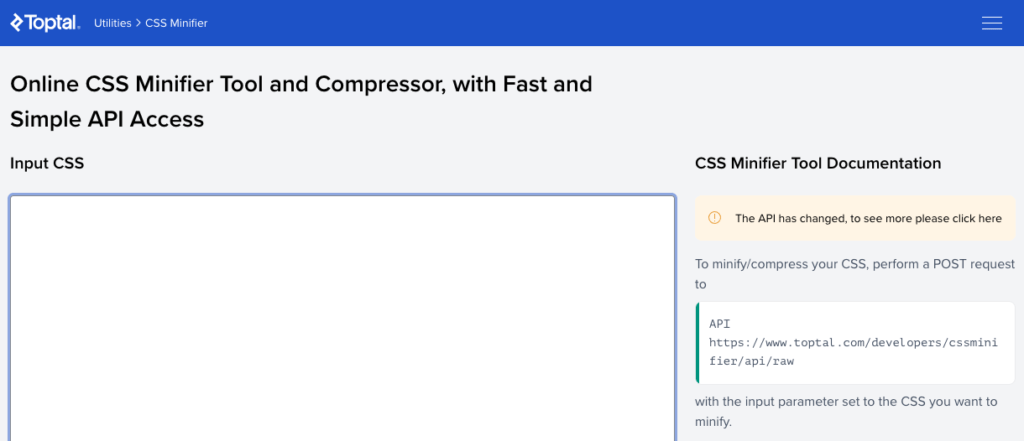
The CSS Minifier tool mentioned earlier is available for free use. To utilize it, you can enter your CSS code and click on the Minify button. The tool will then compress your CSS and generate the optimized output, which you can copy and paste. This optimized code can be downloaded and used to replace your existing CSS code, resulting in a more streamlined and efficient implementation.
Another approach to optimize your website is to combine multiple JavaScript and CSS files into a single file. This consolidation reduces the number of requests made to the server, leading to faster loading times. The file optimization feature in WP Rocket can assist you in achieving this task, making it easier to condense your JavaScript and CSS files and improve your website’s performance.
3. Defer Loading of JavaScript to Eliminate Render-blocking Elements
If you want to improve your FID scores, there’s a technique called “deferring the loading of JavaScript” that you can use. This technique helps eliminate render-blocking elements.
What it does is make your web pages load faster by delaying the loading of JavaScript. Instead of waiting for all JavaScript files to load before showing the page, it loads other content first when a visitor arrives. The JavaScript files are then loaded later, after the rest of the page is ready.
Another way to improve your website’s performance is by configuring your site settings so that the critical CSS (the styling for the important parts of the page) loads quickly. This is important because the “above the fold” content, which refers to the elements that appear first on the page, should load swiftly.
To achieve this, you can take the critical CSS out of the main CSS file and include it directly in your webpage’s code. When you do this, it will load faster and enhance the user experience. Some caching plugins, like WP Rocket, provide a feature known as “Optimize CSS Delivery,” which can be helpful for implementing this optimization.
4. Use a Content Delivery Network to Store Your Contents
A Content Delivery Network (CDN) is a network of servers located in different parts of the world. By storing your website’s content on these servers, your visitors can access your site from the server that is closest to their location. This helps to accelerate the loading times of your website.
When you use a CDN, it can improve the Largest Contentful Paint (LCP) times for your users, which means that the main content of your web pages will load faster. Additionally, it can also help to minimize the Time to First Byte (TTFB), which is the time it takes for the first byte of data to be sent from the server to the user’s browser.
There are several third-party tools available for WordPress sites, and one of the most popular choices is Cloudflare. Therefore, when you integrate Cloudflare with your website, you can take advantage of its CDN capabilities to enhance the performance and speed of your site.

When it comes to Content Delivery Networks (CDNs), it’s worth noting that some hosting providers include CDN solutions as part of their plans. It’s a good idea to check with your web host to see if they offer any integrated CDN options before considering implementing one independently.
5. Properly Size and Optimize Images with Third-party Plugins
To enhance your LCP scores, it’s important to optimize and compress your images to make them smaller in file size. This can be achieved using tools like TinyPNG.
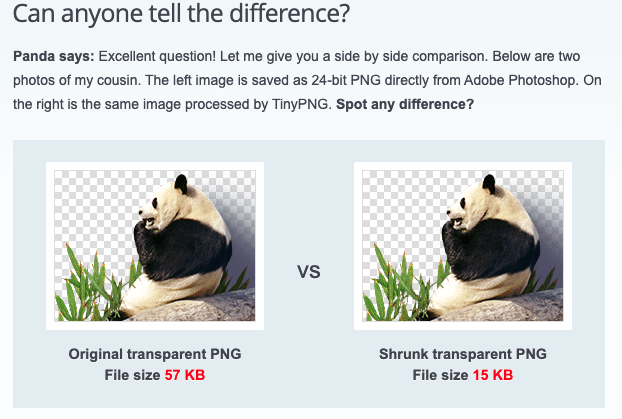
TinyPNG is a tool specifically designed to reduce the file size of your images without significantly sacrificing their quality. It works by compressing the images and removing unnecessary data while preserving the visual appearance.
Image compression tools are incredibly useful for reducing the file size of your images without compromising their quality. In addition to TinyPNG, there are other image optimization plugins available that can further assist you in this process. Some notable options include:
First of all, to optimize your images, it’s important to ensure that they have the right sizes and dimensions. When you upload images through the WordPress editor, the system automatically sets the dimensions for you.
However, if you manually add images using code, it’s crucial to specify the dimensions to allocate space for them. Remember, larger images have bigger file sizes.
Therefore, for you to prevent unnecessary image dimensions, you can add appropriate attributes to allocate space for your page elements. This helps minimize layout shifts and ensures proper rendering. You can adjust the width and height attributes of images and videos on your website by editing the code.
Lastly, to check and edit these attributes, you can right-click on an image on your site’s front end and select Inspect. This will open the Developer Tools panel, where you can view and modify the assigned sizes.
6. Implement Lazy Loading in your WordPress Theme
Lazy loading is a technique that delays the loading of images until they are needed on the webpage. Instead of loading all the images at once, lazy loading loads the images only when they are about to be seen by the user.
Goto your template setting in your wordpress theme and turn on “LazyLoad“. What does lazy load do when you turn it off?
The effect animation allows you to animate your theme images as you scroll, from top to the bottom. It applies even on the next and prev operations creating an effect of loading images to the right or to the left.
The animation effect is canceled if all the required images are not loaded in 2 seconds. This rule is also available at block’s loading content using ajax, if the animation is enabled.
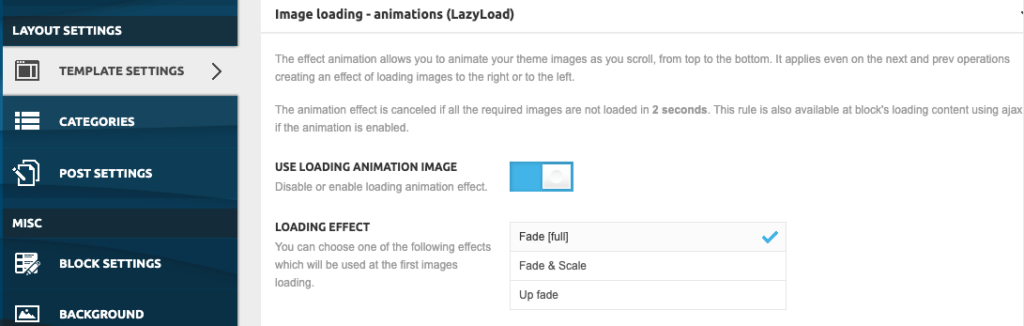
The usage lazy loading in your website, can improve the loading speed of your webpage and enhance the LCP (largest contentful paint) score. Several WordPress image optimization plugins, like Smush, have built-in lazy loading features, making it convenient for you to implement this technique on your website.
7. Optimize Your Website Fonts
The fonts you use on your website can affect how quickly it loads. When a browser loads a webpage, it needs to download and load the font family and its variations, which can take time.
Optimizing your web fonts can help improve your website’s performance. Optimized web fonts are smaller in size and load faster.
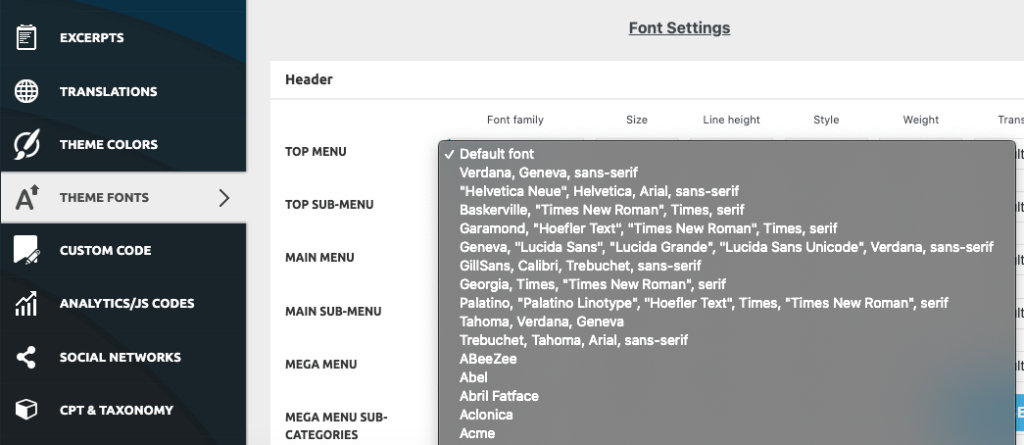
If the web font associated with a text element hasn’t loaded yet, the browser may not render the text properly. Using fallback fonts can also lead to layout shifts, which can negatively impact your CLS score.
To optimize your fonts, it’s a good idea to be selective about the number of fonts you use on your site. If you’re using more than two fonts, it’s recommended to remove them from specific elements and use global fonts instead. This way, only the necessary fonts for the text will be downloaded, improving the loading speed of your website.
8. Upgrade Your WordPress Hosting Plan
If your website is loading slowly, it might be a sign that you need to upgrade your web hosting. Switching from shared hosting to a dedicated server can be a great way to improve the Largest Contentful Paint (LCP) and overall performance of your site.
The web hosting provider you choose has a significant impact on your site’s speed and security. It’s important not to compromise on hosting quality, especially if you have a large or complex website. Upgrading your hosting provider or plan is a fast and effective way to optimize your website and reduce loading times.
I recommend selecting a managed hosting provider that specializes in WordPress and offers servers optimized specifically for it. Such providers can handle technical aspects of site performance, ensuring a high-performance WordPress site. For instance, at DreamHost, we offer DreamPress plans designed for WordPress site owners who want excellent performance without breaking the bank.
Finally Enhance the User Experience of Your Website and Thank me Later
Continuously enhancing the user experience of your website is crucial for its success. Thankfully, there are many convenient tools and plugins available today that can make this process easier than ever before. make great use of this advise on this page and get more traffic.
- ChatGPT AI Chatbot – How to Use, Download, Signup and Login
- Guest Post Blogger Refuses to Pay you After Publishing their Articles
- Finding Keywords that is easy to Rank to Increase Traffic
- Tips to Get Text from Image Automatically with AI
- ChatGPT Red Flags and Google Code Red Alerts
- Trying to use ChatGPT and Jasper Ai?


